Learn in a minute
Must read guide on how to design Shopify themes
1 Create new page
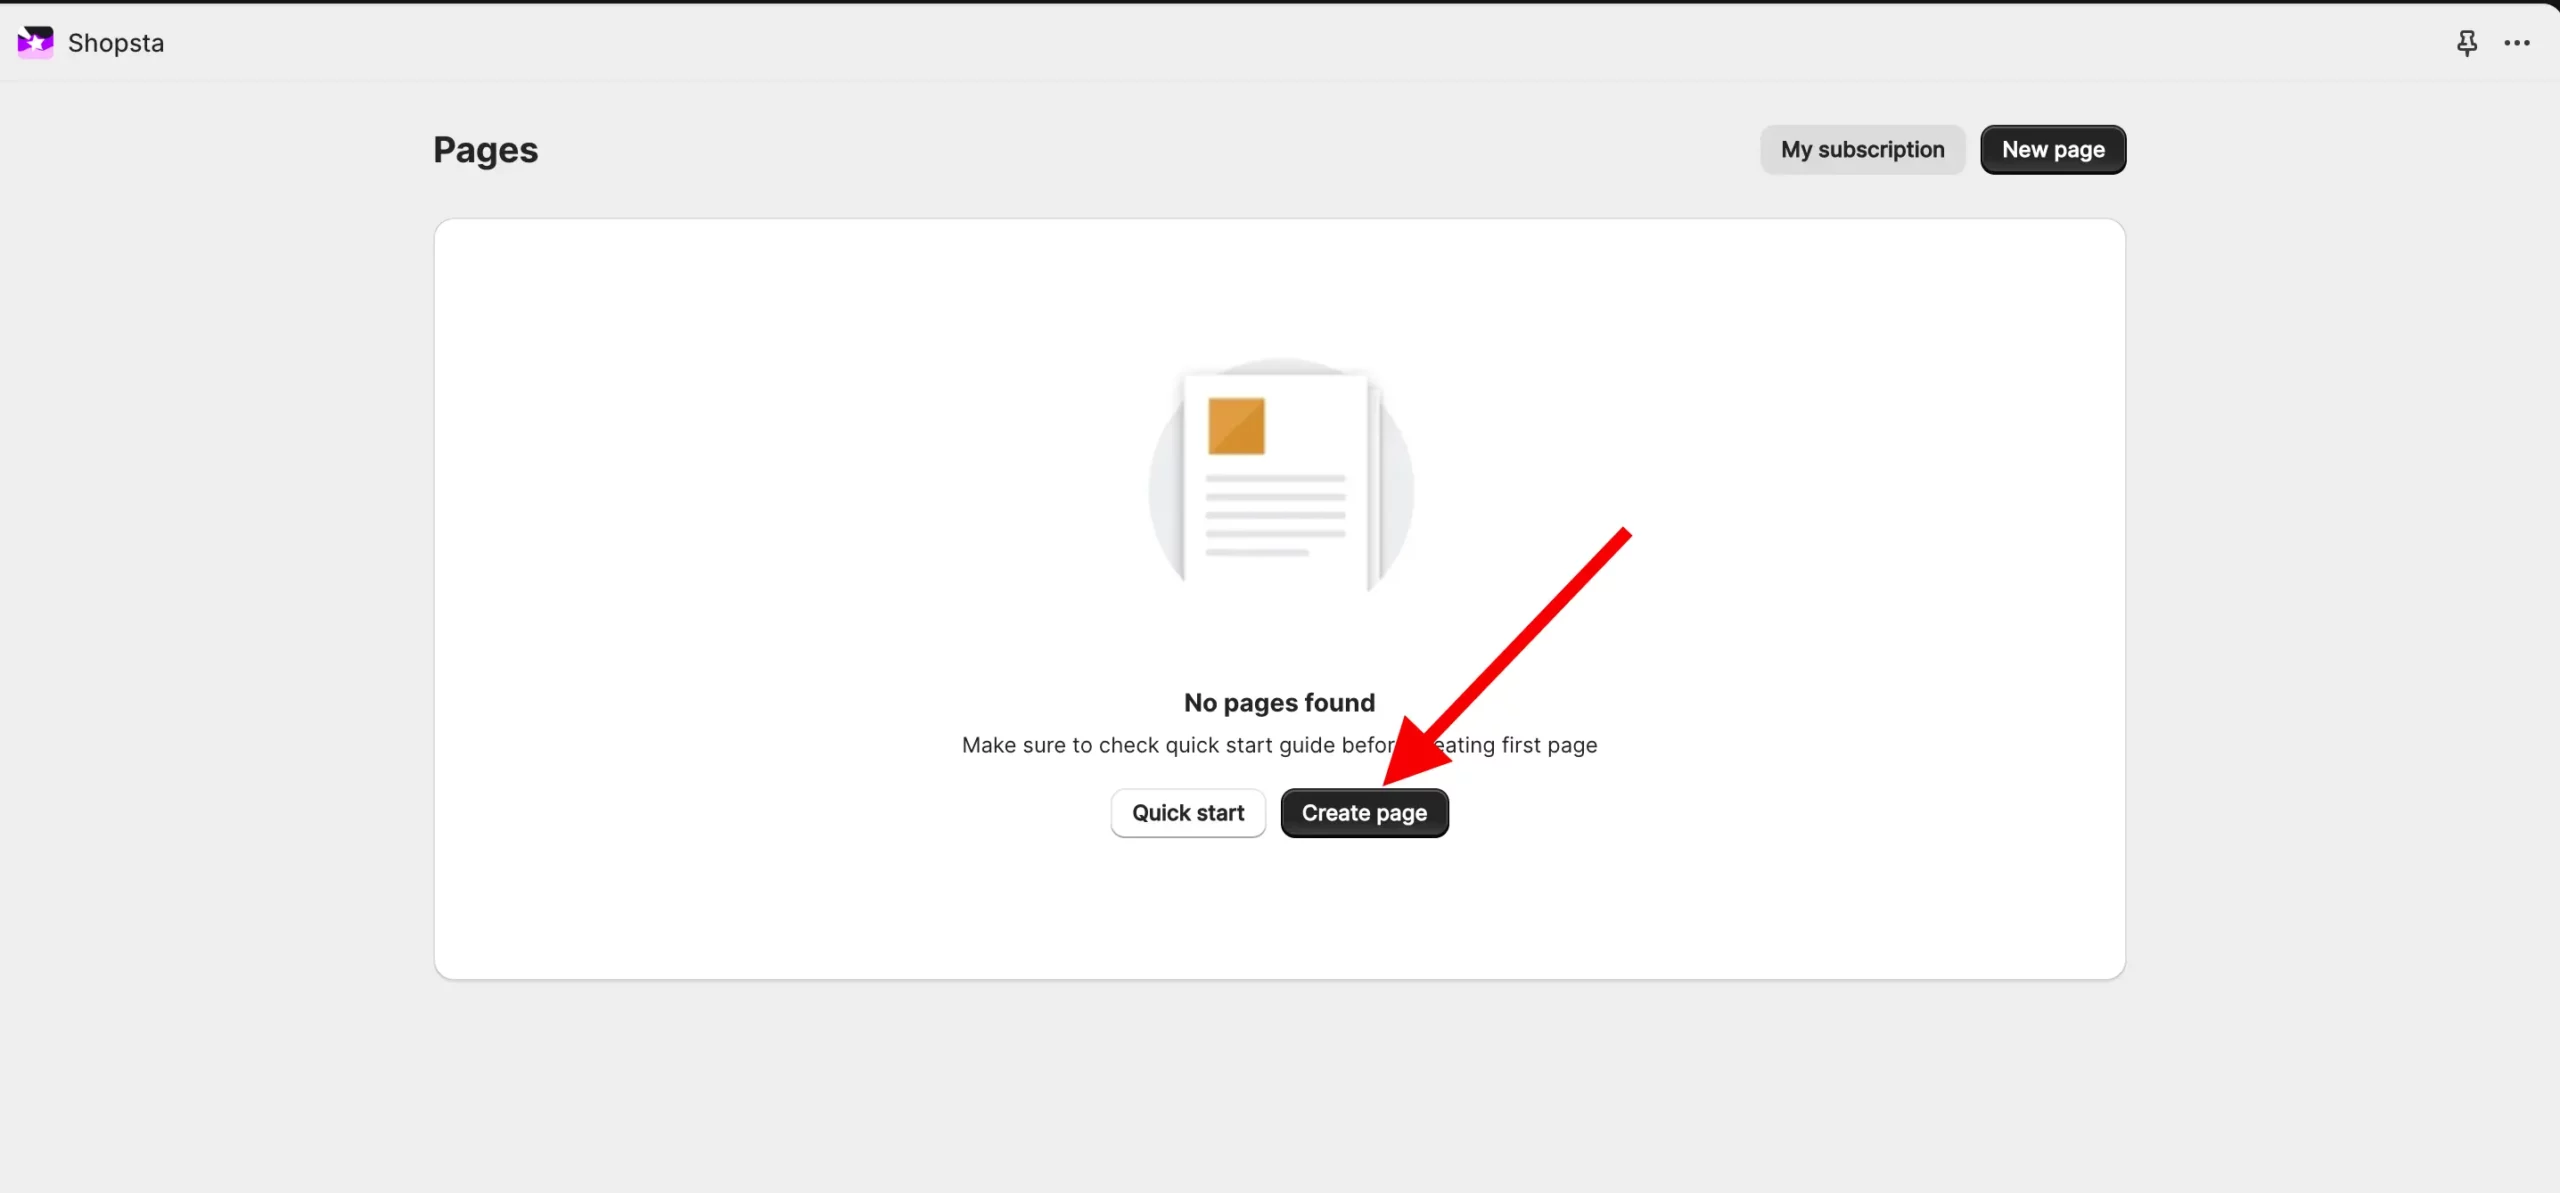
After you install Shopsta for the first time, you will see similar screen as on screenshot, click “Create page” to design your first Shopify page.

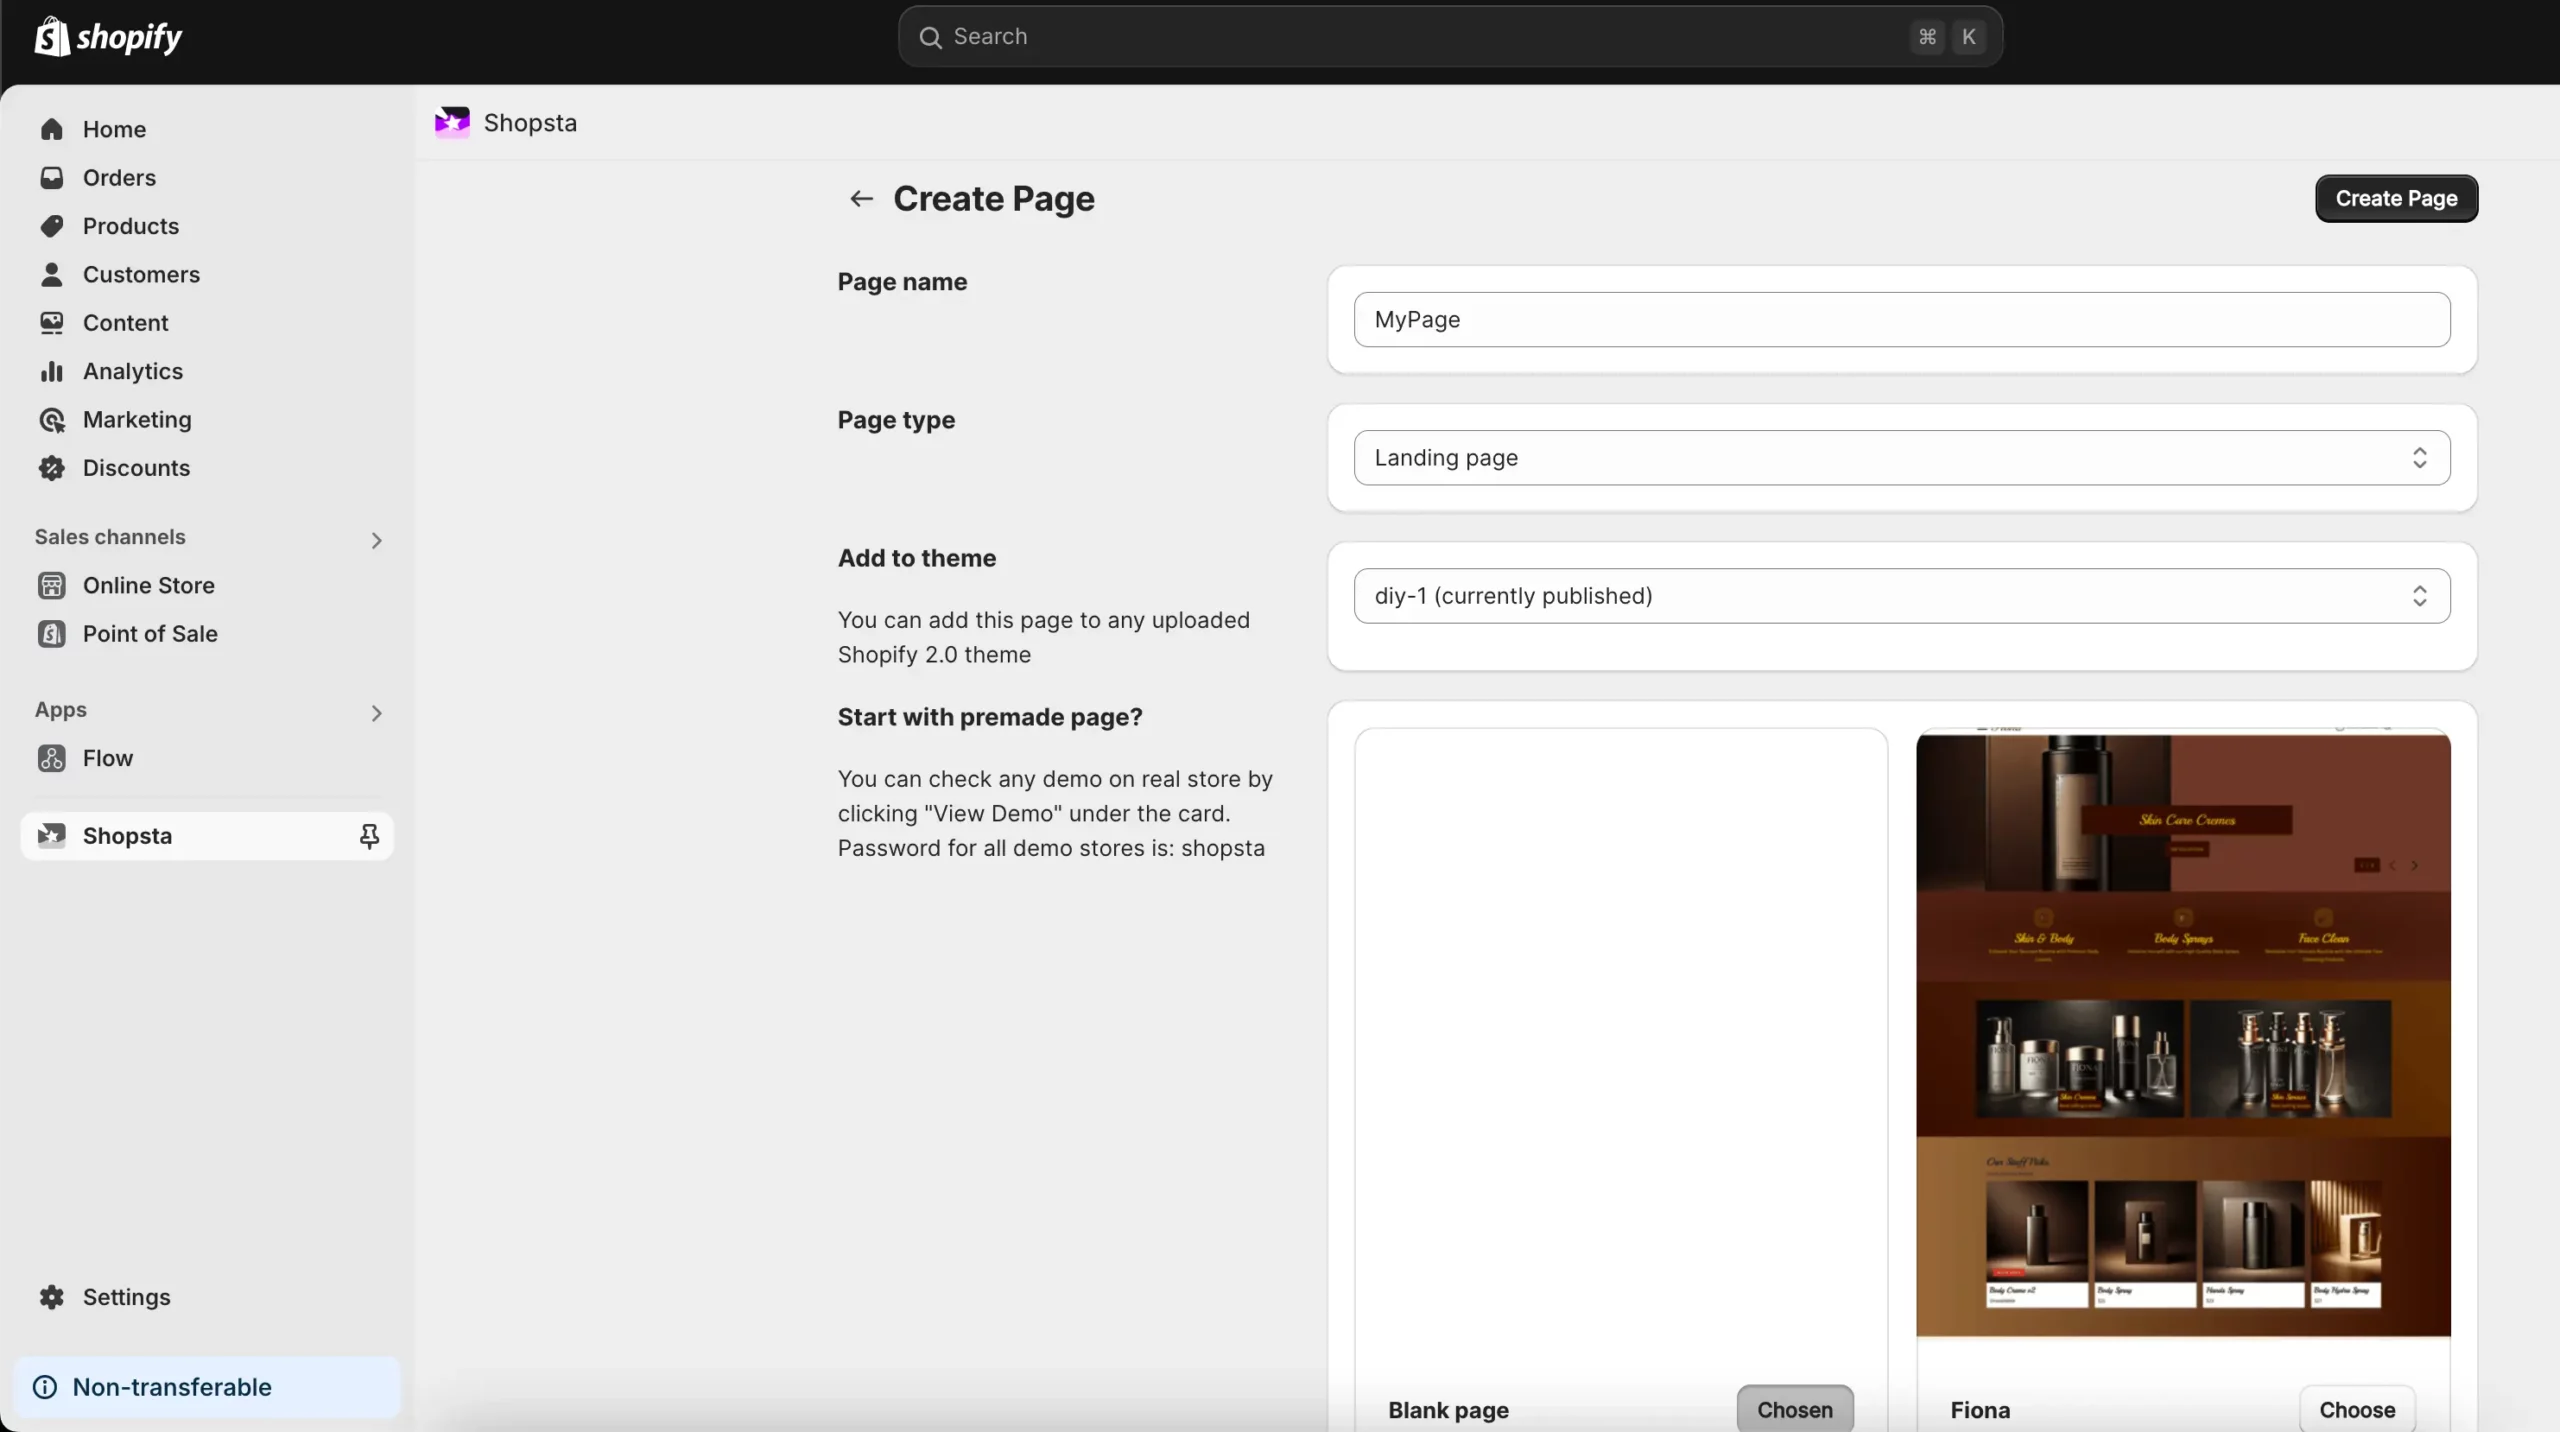
Now choose name for your page and choose page type, which means choose kind of page you want to design. Make sure to choose in which theme new page should be added to. And last step is to scroll down and pick a page to start with by clicking “Choose” button in it’s card. Now click “Create page” to go to Shopsta page builder

2 Design page
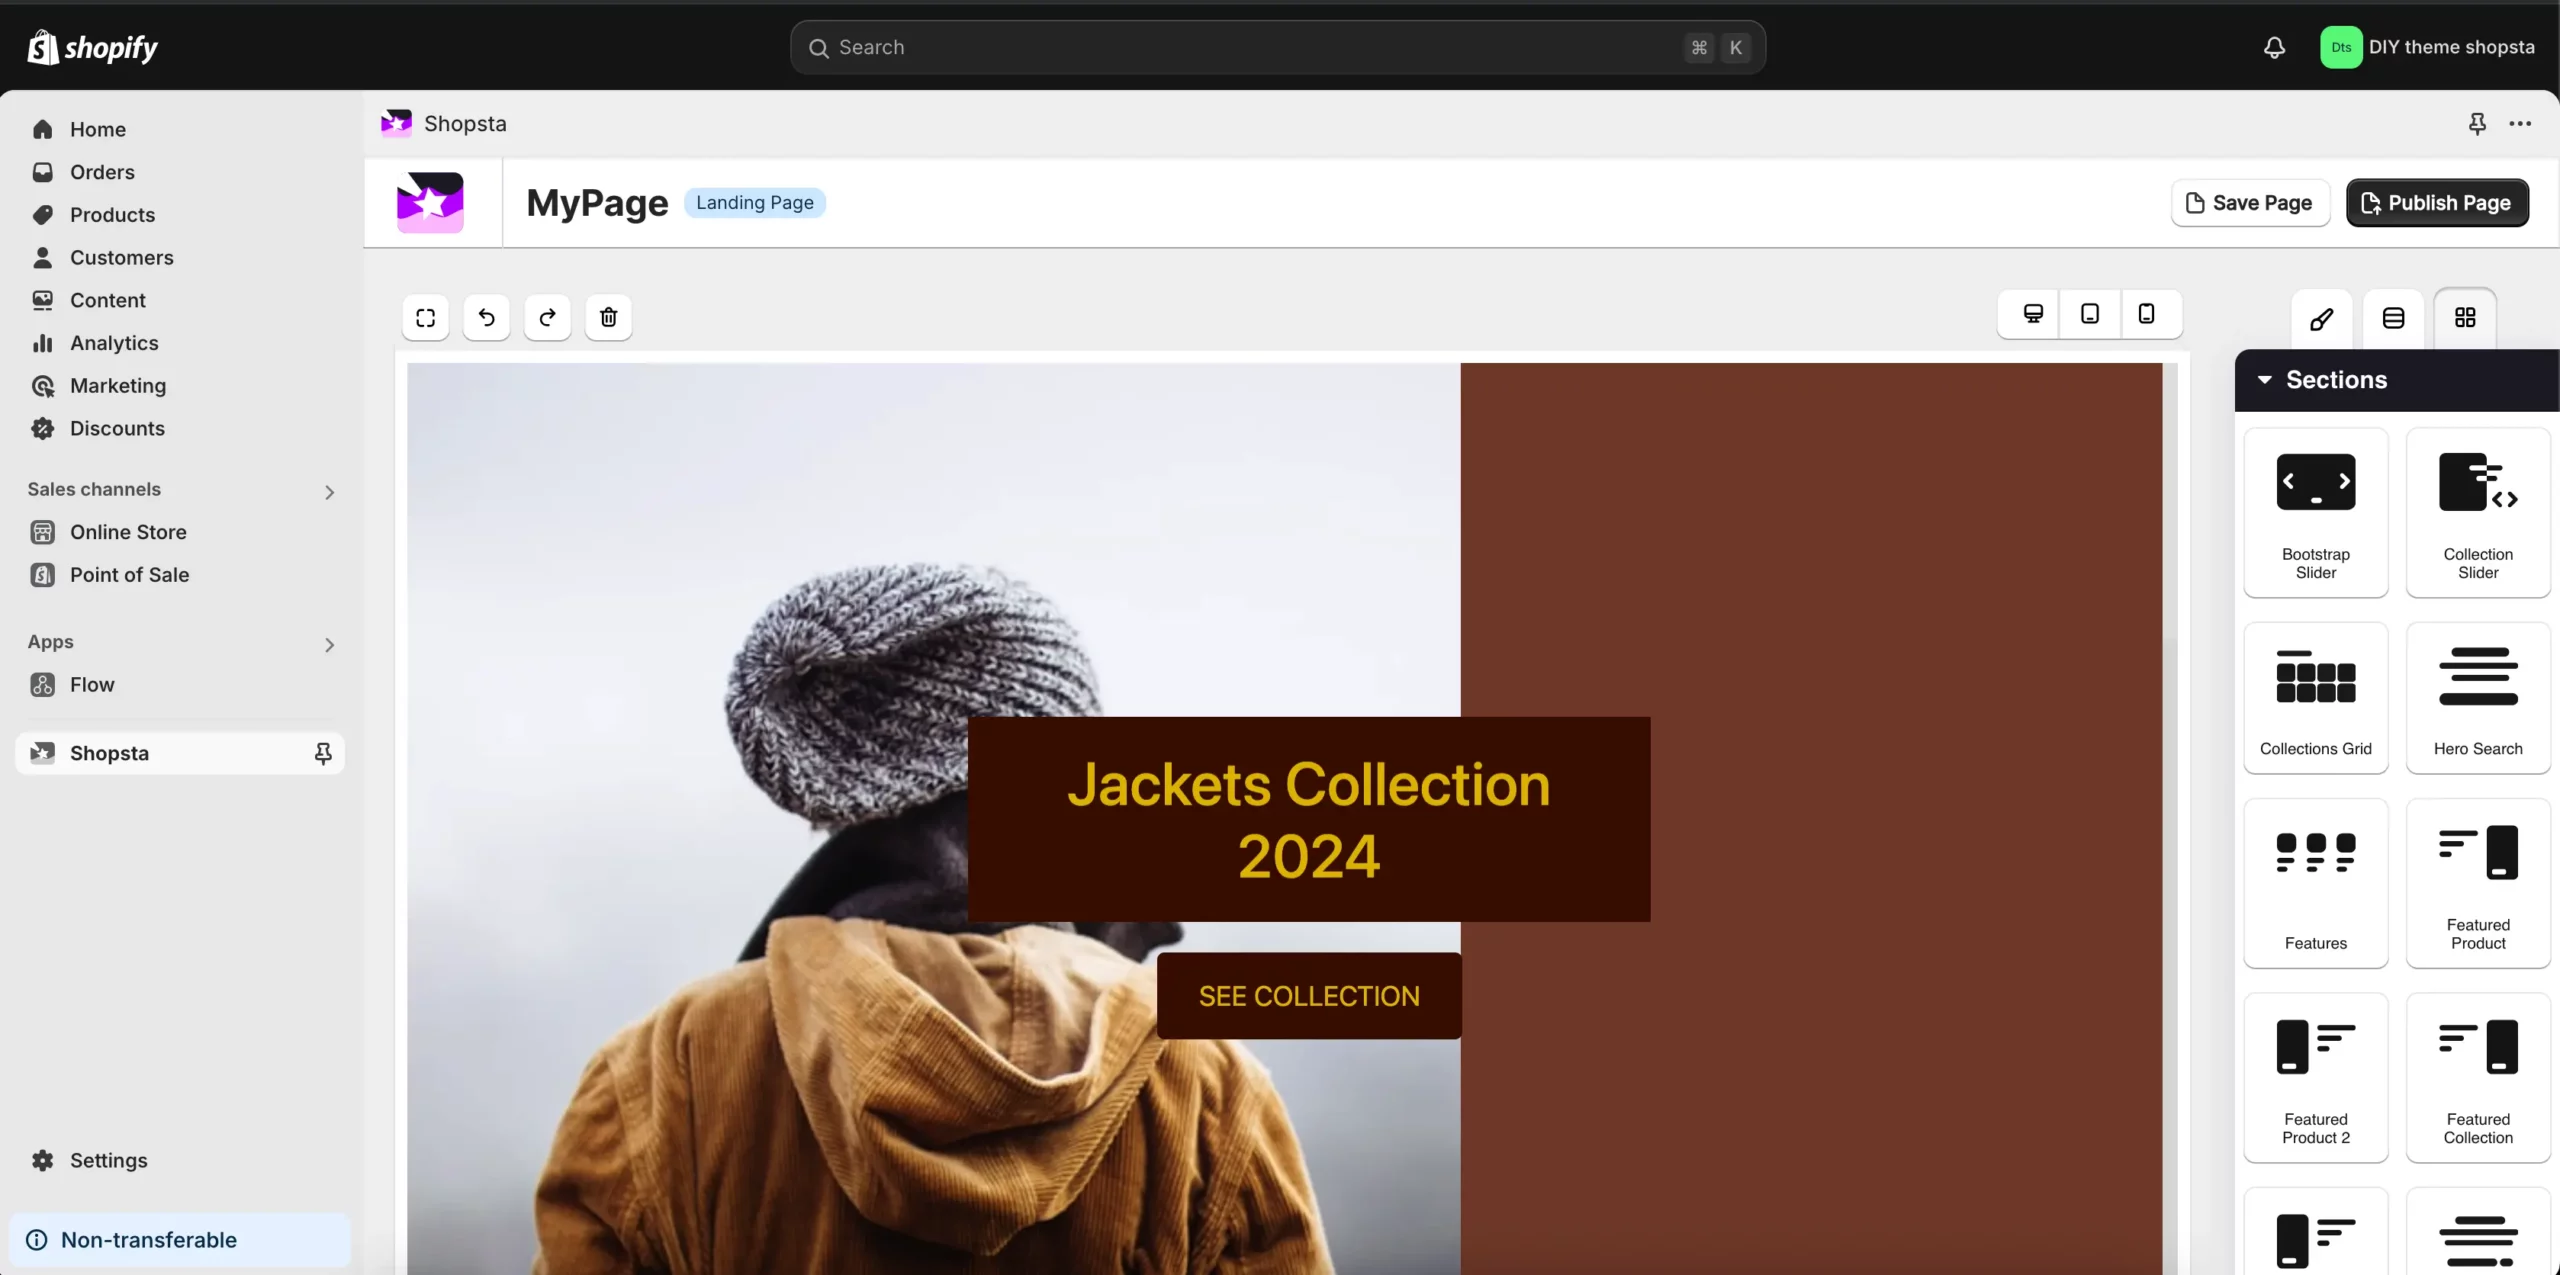
Our page builder is loaded now, click and drag sections you like from the right side to the main page area. You can also customize any element by clicking it and using right side panel tools to adjust it. Now click “Save”

3 Publish page
Finally, publish your page by clicking black button saying “Publish Page” and follow the instructions.
3 FAQ
Q: Why some page elements looks different in Shopsta app than in exported page?
A: We use generic page elements in Shopsta editor and point of those elements is to adapt to your current theme styling, giving you fastest possible, native Shopify section based pages.
Q: Premade page I chose looks different than one on the demo
A: We do not add backgrounds to whole sections inside of Shopsta app because you can add background layers to almost all of our sections after exporting. This is for example why you may see white section in Shopsta page builder…it’s text is white so we can use background layers with dark color in exported page. How to add backgrounds to Shopify sections


